Tag Archives: birthday cake

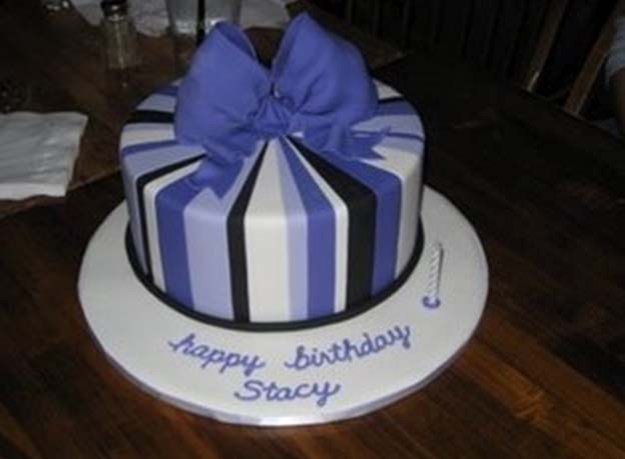
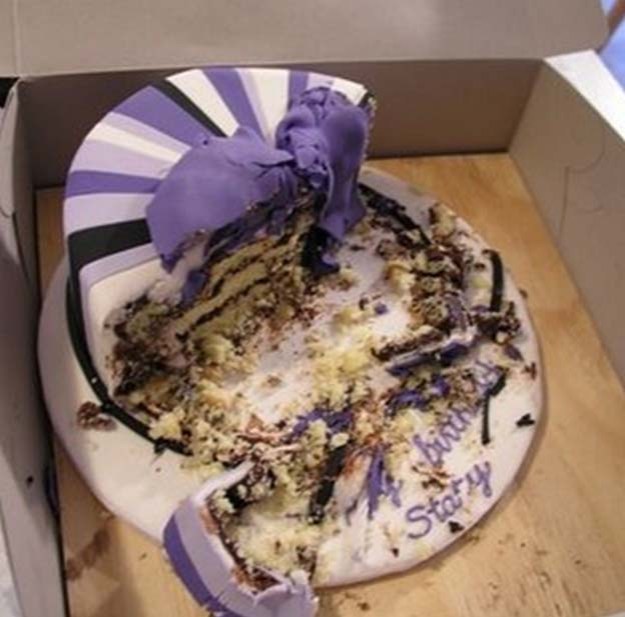
Purple Striped Birthday Cake

The following was originally posted on my first blog, The Planet Cake Intern, as I learned the art of cake decorating and began putting together the very first pieces of my cake business in Kansas City. 

Flashback - talksweettome.com

Originally posted August 1, 2008

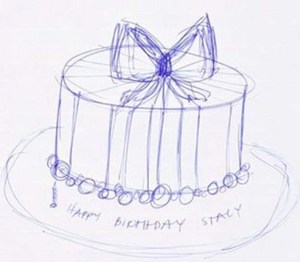
My very good friend Stacy had a birthday a couple weeks ago and needed a cake to celebrate – after all, what is a birthday without a cake? A yellow cake with dark chocolate ganache and the color purple were my only design constrictions, which left things pretty much wide open. I decided on a simple but fun striped cake with a big purple bow.

Cake design drawing

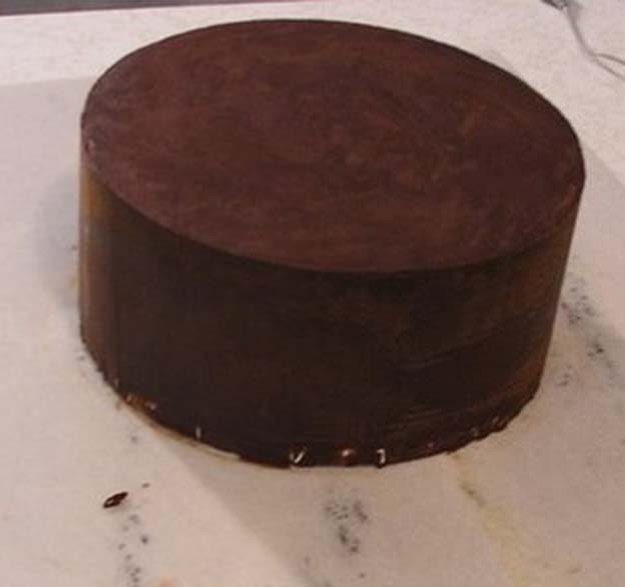
First I ganached the cake…

Ganached cake

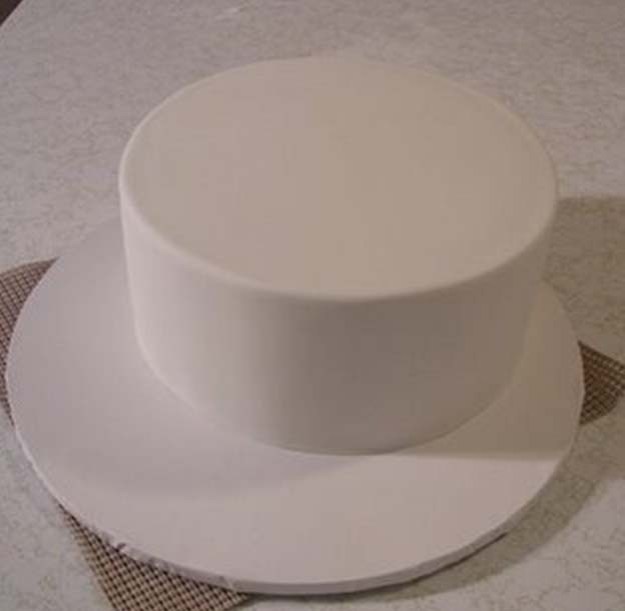
…and covered it with white icing.

Covered cake - Talk Sweet to Me

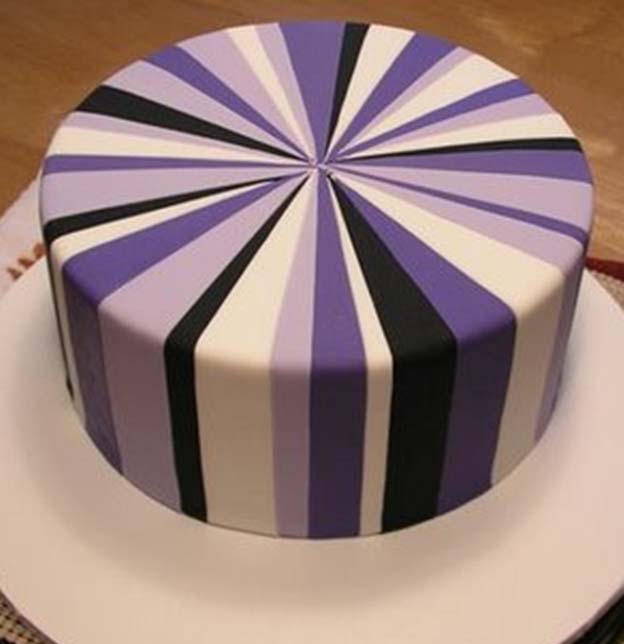
Then it was on to the stripes. When doing the stripes on the Madhatter cake, Anna-Maria taught us to start with an “X” of colored stripes and fan the stripes out to the sides from there.

Putting stripes on cake - Talk Sweet to Me

Finally finished!

Stripes complete - Talk Sweet to Me

Moving on to the bow…

finishing purple bow - Talk Sweet to Me

…and then I just added a black rope around the base and a message on the board to complete the cake:

Purple Striped Birthday Cake - Talk Sweet to Me

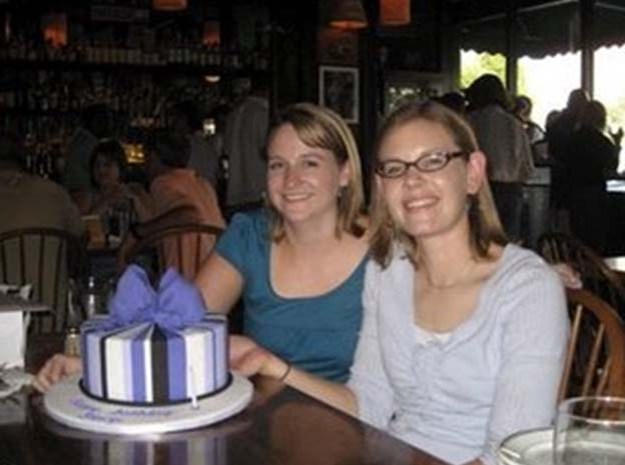
When we got to the restaurant where Stacy’s birthday celebration was being held, I added on a candle…which was probably not really necessary since we forgot to light it. Whoops!

Cake at bar with candle

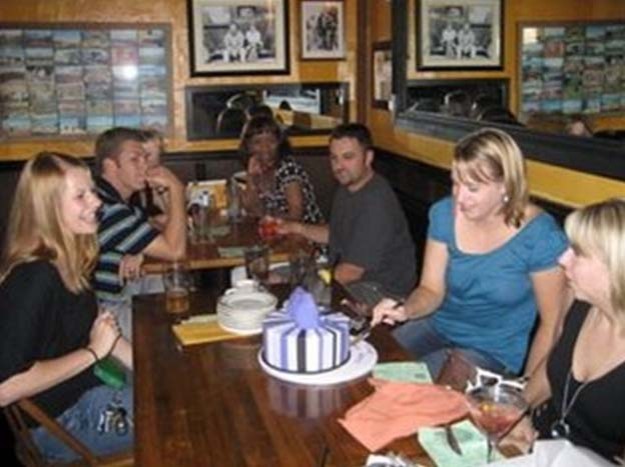
This cake brought a lot of attention to our table. People kept stopping on their way by and asking if it was a real cake (as opposed to a fake one that we were cutting into and eating?), asking if the bow was really a ribbon (no – shock!) and actually getting up from their tables to come see what all the fuss was about and talk about cake for a minute or two.

Stacy and me


Friends at birthday party - Talk Sweet to Me

We decided that it would be a good advertising scheme to make a cake and take it to a new place every weekend…then just hand out cards like crazy when people came over to check it out. Even if it ended up not working, at least we’d have some fun along the way!

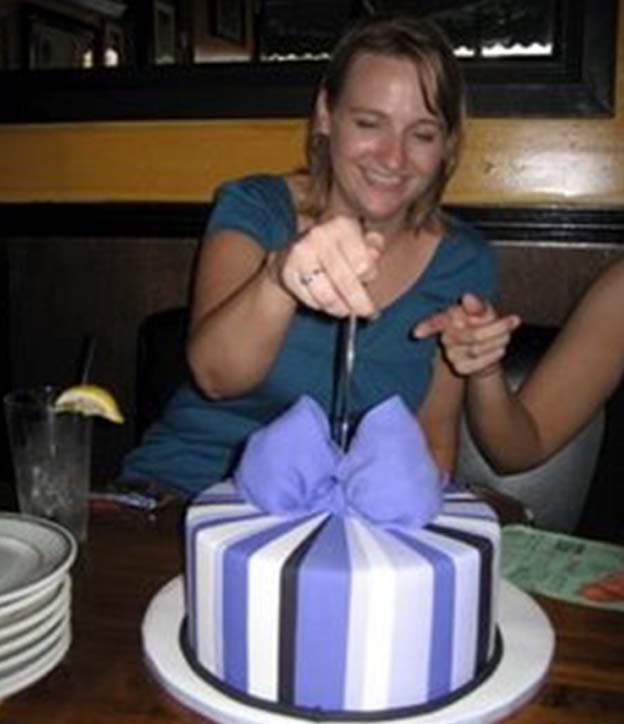
Eventually it was time to cut the cake…

Stacy cutting the cake - Talk Sweet to Me

…and enjoy eating it!

Cake was delicious - Talk Sweet to Me

Signature - TalkSweetToMe.com


Bookworm Birthday Cake – Step By Step

The following was originally posted on my first blog, The Planet Cake Intern, as I learned the art of cake decorating and began putting together the very first pieces of my cake business in Kansas City. 

Flashback - talksweettome.com

Originally posted July 26, 2008

I was delighted to have the chance to make a birthday cake for my friend Hannah (#32) from my soccer years…go Ames Flames! Her mom was having a pretty important birthday and she wanted to surprise her with “something different” for her birthday present – so contacted me to make a cake!

Hannah’s mom is a librarian and also loves to eat healthy food. We bounced around some ideas and finally came up with a cute little bookworm – complete with wire-rimmed glasses – coming out of an apple with a couple of books nearby:

Bookworm cake sketch - Talk Sweet to Me

I quickly went out to the store to buy the most perfect apple I could find to use as a model. GOR-geous.

apple

It is possible that this could have been done entirely of cake, with a board in the middle and dowels to support the top half of the apple. However, Hannah didn’t require that much cake and so I decided to do the bottom half in styro, top half in cake, with a dowel through the middle for support.

Ganached cake - Talk Sweet to Me

I had a momentary panic attack when covering this cake. One of the hardest cakes I ever covered was the soccer ball cake, and I was lucky that Handi was there to help me when I was doing that one. So, channeling some good Planet Cake vibes, I rolled out the icing a little bit thicker than normal to allow for some stretching around the shape and went to town. A little round piece was cut out of the red of the apple and I inserted black icing to make a hole for the worm to come out of.

Covered cake - Talk Sweet to Me

On to the books. These were made of cake with a cardboard base for support so that I would be able to set one at an angle.

Cutting cake for books

Ganaching…

Ganached books

I covered the sides with white and made marks for the pages first.

Covering book with fondant - pages

Then I added thicker icing overhanging the edges for the book cover.

Cake book - Talk Sweet to Me

Next I carved the styro for the worm and covered it with green icing. Then just added texture, wire-rimmed glasses (much harder to bend to shape than I thought they would be, by the way), and a face. My ninja brush was not cooperating. The black went on a little thicker than I would have liked, but ended up looking okay after some minor catastrophe-aversion techniques were employed.

Bookworm - Talk Sweet to Me

Next I added titles to the books and painted them gold.

Cake books finished - Talk Sweet to Me

Putting everything together…

Apple and bookworm cake from top - Talk Sweet to Me

…and the finished cake!

Bookworm cake - Talk Sweet to Me

My mom has been letting me use her fabulous silicone rolling pin. I told her how great it was and she immediately told me not to buy one because they (whoever ‘they’ are!) found toxic substances in them. I knew this could not possibly be true because Handi owns more than one, and surely if there were anyone who would know about those kinds of things, it would be Handi and the rest of the Planet Cake team (and they would have let me know about this on one of the days rolling pins came up in conversation, right?!). Turns out, this was her way of trying to get me to avoid buying one because she had one hidden away for me as a Christmas present. Anyway, Christmas came early this year, and I now have my very own bright red rolling pin.

Me with rolling pin

I’m one happy gal.

Signature - TalkSweetToMe.com

How to Carve Styrofoam Base Elements for Custom 3-D Cake Decorations

The following was originally posted on my first blog, The Planet Cake Intern, as I learned the art of cake decorating and began putting together the very first pieces of my cake business in Kansas City. 

Take some of the lessons I learned on the below cake project to make your carved Styrofoam bases easier to cover with fondant for custom 3-D cake decorations!

Flashback - talksweettome.com

Originally posted July 2008

I recently designed a cake for a client whose husband was turning 60 and she wanted to give him a special cake at a surprise party with their friends, family, and neighbors. Apparently he likes to walk around the neighborhood park with their miniature dachshund…a lot. So she asked me to put together a cake with a figurine of her husband, the dog (no leash), and the fountain from the park he walks in. Here is what I came up with:

Cake sketch

Again, one of those really fast sketches on the same sheet of paper as one of my many “to-do” lists. It was kind of hard to tastefully incorporate all the elements she was looking for.

The covered cake:

Covered cake

Around their neighborhood there are signs for the streets that are embedded in the sidewalks.

Rockhill road sign

I got out the ninja brush again and made the sugar version. A pencil is in there for scale.

Rockhill sugar sign - Talk Sweet to Me

The sidewalk with road sign and a rock paving pattern were added to the cake:

Cake and beginning decoration

Next was the dog. Here is Max:

Dog inspiration photo - Talk Sweet to Me

This was much trickier than either Margie or Handi made it look…and since I’d never attempted one before, of course found a few things I’d do differently next time. I’ll tell you here so that if you’re making one yourself, you don’t have to make the same mistakes I did! I actually carved the legs out of Styrofoam, and they were a little bit stumpy.

Carved styro dog

A few days after the cake was delivered I remembered that Margie used skewers for the legs of the horse she did a few months ago. I’d probably do that next time, which would give me a better way to anchor the dog to the cake (I used royal icing this time) and also allow me to make the legs thinner. I’d also make the snout skinnier – either just with icing or with a skewer as a base there too – work on making the eyes more realistic, and add some texture for the fur. (I was reminded of this while watching Elisa Strauss’ YouTube video of the dog cake. If you haven’t seen it yet, check it out here.)

Dog figurine - Talk Sweet to Me

I covered a wire with icing and inserted it into the styro to make the tail, made a couple of ears out of icing, then painted the parts that needed to be black with food coloring. Overall, I think the attempt was okay, but I know there is room for improvement and learned a lot from it.

Finished sugar dog - Talk Sweet to Me

Next was the man. I saw Handi make a dancing groom one time and he told me that when you do the figurines where only one leg is anchoring it to the cake, you must insert the skewer up through that leg…but then make the skewer come out in the exact center of the shoulders of the figurine so the head will be centered. I had to make two attempts at carving the styro for it because I had such a hard time inserting the skewer correctly (Handi will not be surprised when he reads this!):

Man figurine 1

I was unhappy with my proportioning here, but share it anyway so all you cake people out there can benefit from my mistakes! The torso is too long, and the legs are too short and stout. The lesson: *measure carefully* when starting to carve, and remember that the styro must be skinnier than you want it to end up being since the icing adds bulk. Adding the shorts:

Man figurine 2

He usually walks his dog in khaki shorts, a yellow polo shirt, and black flip-flops with socks.

Man figurine - Talk Sweet to Me

The finished figurine:

Man walking figurine - Talk Sweet to Me

I was most proud of the fountain on this cake. Here is what I was going for:

Fountain inspiration - Talk Sweet to Me

So I carved the three bowls and the base out of styro…

Carved fountain - Talk Sweet to Me

…then covered them with icing.

Fountain elements

After that, it was time to make it more realistic with some piping.

Sugar fountain no water - Talk Sweet to Me

I added some water and secured it to the cake with royal icing:

Sugar fountain - Talk Sweet to Me

After that it was just a matter of adding the other figurines, piping on some shrubs and grass, adding flowers, and finishing the message and candles on the board. Here is the finished cake:

Man and Dog Birthday Cake - Talk Sweet to Me

It was fun to deliver the cake and meet Max…he’s even cuter in person! The client was very happy with it, so I decided I was too. I guess for a first attempt at a dog and a walking/dancing figurine (without Handi and Margie’s expert advice), it was okay. I learned enough to do better next time, at least.

Signature - TalkSweetToMe.com

An 80th Birthday Cake – Full of Memories

The following was originally posted on my first blog, The Planet Cake Intern, as I learned the art of cake decorating and began putting together the very first pieces of my cake business in Kansas City. 

Flashback - talksweettome.com

Originally posted June 2008

My Grandpa turned 80 this year, and the whole family gathered in Illinois for his birthday party. It was a blast to see everyone. I figured we needed cake. It all started with three 13×9 vanilla butter cakes and a plywood board wrapped with clear plastic.

Starting cake decorating project - Talk Sweet to Me

I cut the shape of the rolling hills,

Carving cake - Talk Sweet to Me

and covered it with ganache.

Ganached cake - Talk Sweet to Me

Then I covered the cake and the board with icing, adding a rough texture with the edge of a piece of broken styro…

Green hills 2 - Talk Sweet to Me

…and started in on some of the final decorations.

Green hills - Talk Sweet to Me

Then it was time to make the Jeep. I carved the body of the Jeep out of styro and made the wheel covers and front windshield base from balsa wood.

Sugar Jeep in process 4 - Talk Sweet to Me

The wheels had aluminum foil as their support, and were later iced, glued to the end of a skewer, and inserted into the styro.

Sugar Jeep in process 3 - Talk Sweet to Me

My Grandpa worked for ALCOA for years, and had seat cushions in the back of the Jeep for all of us to sit on, so I painted the logo onto the cushions. A penny is there for size reference on (the penny is a bit bigger than a 5 cent piece in Australia, but smaller than the 10 cent piece). I had to use my version of Margie’s ninja brush!

Sugar Alcoa cushions - Talk Sweet to Me

Then I covered the Jeep, which was quite tricky (especially since the styro I used was different, lumpy, and gross to work with), added seats, steering wheel, cushions, and gear shift, and got ready to put the top on.

Sugar Jeep in process 2 - Talk Sweet to Me

Working…

Working on sugar jeep - Talk Sweet to Me

I made a “cage” out of skewers and then glued acetate onto them so there would be clear windows, leaving the doors open as they were on the Jeep, and painting the insides of the skewers black so they couldn’t be seen when you looked in the windows from the outside.

Sugar Jeep in process - Talk Sweet to Me

Then I put the black top on and cut out the windows. This is the back of the reference Jeep image I used.

Example Jeep 2

And the view from the back. My Grandpa’s Jeep was box-ier, a different color, and had a different seating arrangement than the reference Jeep, so I had to work from memory a little bit.

Back of sugar jeep close up - Talk Sweet to Me

Reference Jeep from the front…

Example Jeep 1

…and the miniature version:

Sugar jeep close-up 2 - Talk Sweet to Me

Here is the Jeep once it was placed on the cake. Watch out for those cow pies in the prairie! My Dad used to pretend to fall off the back of the Jeep and nearly landed in one…

Sugar jeep close-up - Talk Sweet to Me

The finished cake…

Whoop de do cake - Talk Sweet to Me

My Grandpa used to take me, my sister, and my two cousins for rides in the Jeep whenever we visited. He took us out on the prairie, and every time we went over the hills, he called them “whoop-de-dos.” Then he would turn around, go over them the other way, and call them “do-de-whoops.” Hence the message on the board…

Back of Jeep birthday cake - Talk Sweet to Me

Sometimes we also got “stuck” in the creek and my Grandpa would tease that we would all have to get out and push. The creek was important enough to make an appearance on the cake too.

The cake and Jeep made it to Illinois on a 3.5-hour car ride with no problems whatsoever. Presenting Grandpa with his 80th birthday cake…

Grandpa likes the cake

Then it was time to light the candles and blow them out!

Grandpa blowing out candles - Talk Sweet to Me

Done!

Cake eaten - Talk Sweet to Me

Signature - TalkSweetToMe.com